Nikon AF Fine Tuning
Back to Notes on Photography
by Makoto Honda
October 14, 2012
What a shocker
I thought AF fine tuning is for some camera nerds, or someone who is lucky enough to have gotten a camera (one out of a million) that somehow slipped by a camera manufacturer's quality assurance inspection process. No! Two of my Nikons (D300 and D7000) needed a fair amount of AF fine tuning. No kidding...
AF fine tuning
If you google the web, you will find many sites describing how to fine tune your AF camera - provided your DSLR camera offers AF fine tuning. Many describe more less the same method, using a test chart of one kind or another, tilted 45 degrees toward the camera. The main difficulty is that it is not easy to specify where the camera is supposed to be focusing - because a camera's focus area (one AF sensor) is relatively large. Only Nikon site recommends focusing on the plane surface (like a book) facing straight to the camera, combined with the tilted chart.
In all cases, the idea is that even if the AF focus is off a bit, some point on the tilted chart must be in sharp focus. Depending on whether the sharpest point is closer to or farther than the intended focus point, you adjust your camera's AF fine tuner accordingly.
There are two issues. 1) It is not easy to determine where the intended focus point is. 2) Looking at the chart, it is often not clear where the image is the sharpest, especially when testing a wide angle lens.
The best and easiest way
to fine tune your AF camera
After testing a few methods, I came up with my own way to do AF fine tuning - and this is the easiest. I will describe it using my Nikon cameras,
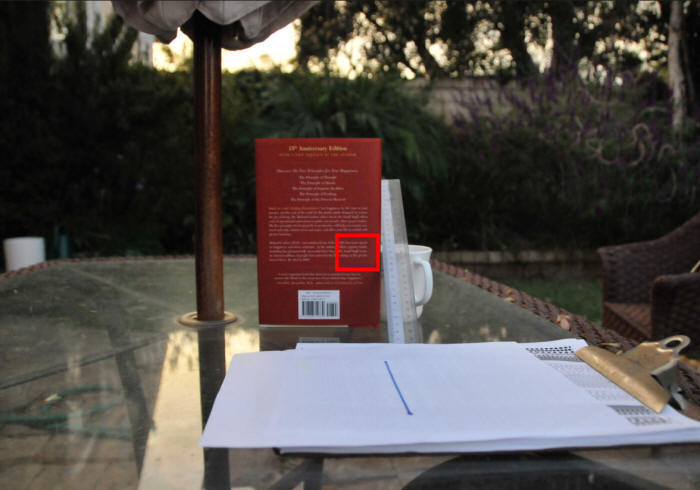
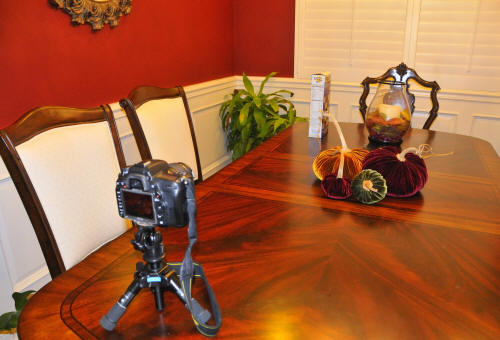
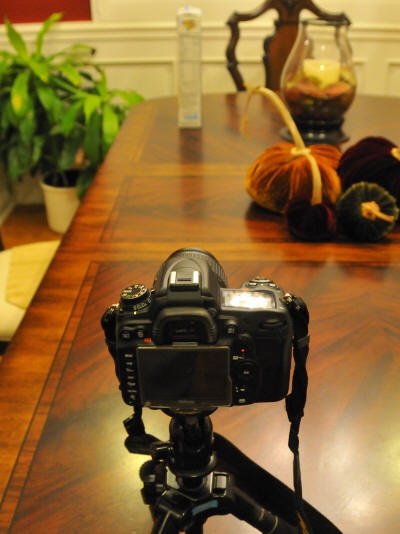
- Use
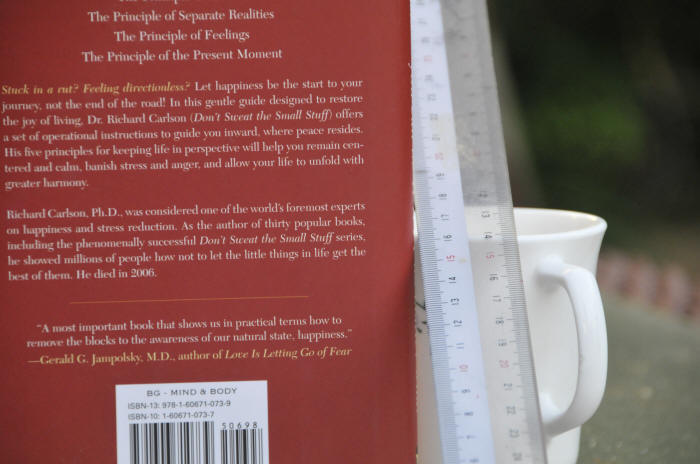
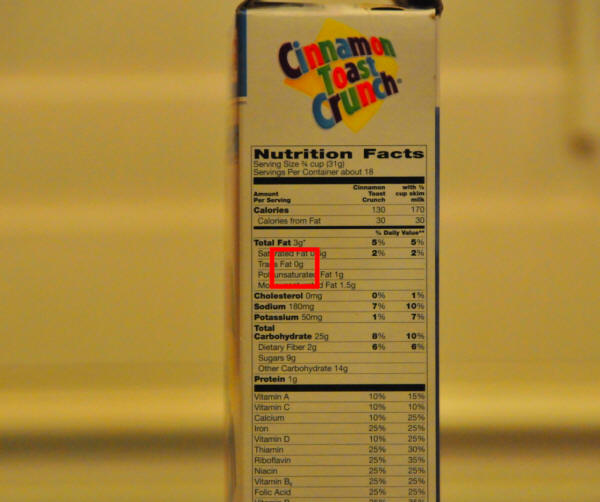
a cereal box (the side where the nutritional info is printed)
-
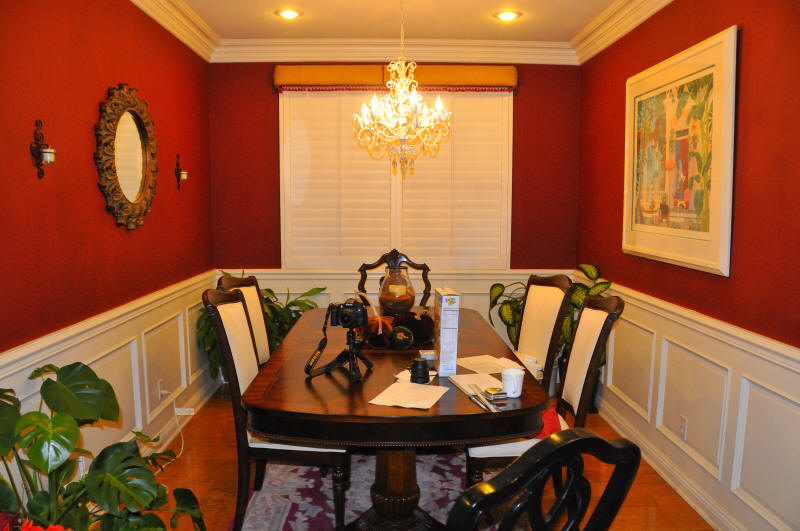
Put the cereal box 5 feet from the camera. Why 5 feet? Because it is a
reasonable distance attainable on the dinner table.
-
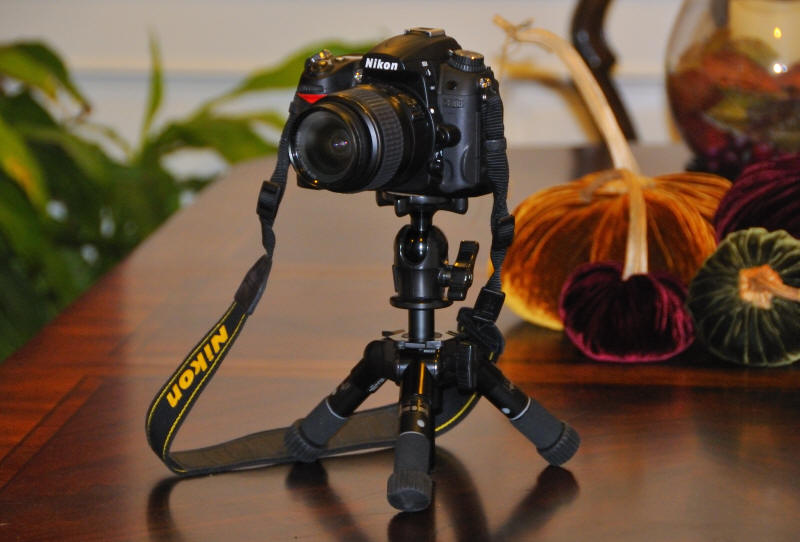
Use a tripod to rule out the image blur. I used a mini-tripod for this
test.
-
Feel free to use a high ISO, like 1600 or 3200, to avoid a slow shutter
if room lighting is poor. Graininess is ok.
-
Use the widest aperture of the lens to reveal the mis-focus most
clearly.
-
Use a single focus point of your AF camera, and position it in the frame
center.
-
Turn off VR (image stabilization) to avoid interference
With these preparations, you are now ready to do AF fine tuning very
easily, as shown below.
Note that AF
fine tuning influences a wide-angle lens more than a telephoto lens.
That is, changing the fine tuning values (40 values in the case of
Nikon, from -20 to +20) by a few points may not affect the AF accuracy
of a long lens very much, but the same change will drastically alter the
AF accuracy of a short focal-length lens. So, when testing a zoom lens,
it is better to do teh AF adjustment using the widest zoom setting.


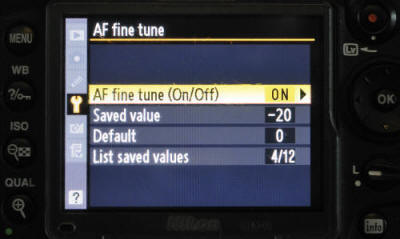
Nikon D7000 - AF Fine Tuning Procedure (Manual p.246)
In order to do this test, you must know the AF fine tuning procedure specific to your camera.
|
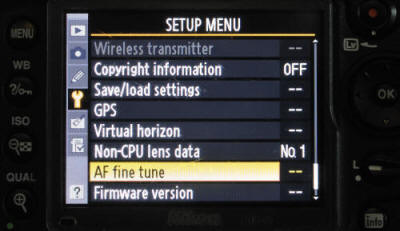
1)
Setup Menu - AF fine tune -
ON Keep it
ON - This does not affect the lens not registered |

Now, this is how to do AF fine tuning adjustment for your camera
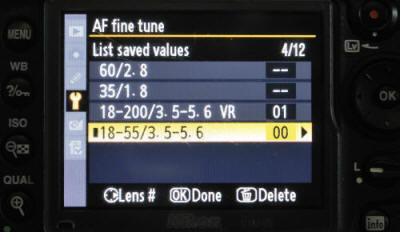
Nikon camera allows you to choose one of +20 .... 0 .... -20 fine-tuning values for a given lens. Camera remembers one value for each different CPU lens (max 20 lenses). Whatever value you set or re-set, you are setting the value for the lens currently attached to the camera.
Turn the AF on (both camera & lens). Set AF to Single AF mode (not Continuous) and select the smallest AF area. Keep it in the frame center.
Aim the AF area on the cereal box of your choice. (The nutritional info area is a good target.)
Using the AF fine tuning procedure above, turn the AF fine tune ON (1).
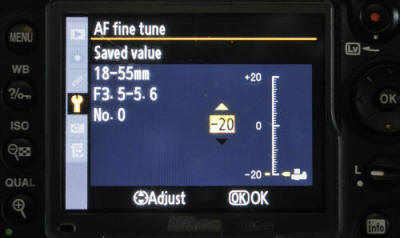
Then go to Saved value (2), and set the value to, say, -10, and OK, and
shoot the cereal box. Then try -15, OK, and shoot, and so on.
Now, review the pictures using the camera's rear LCD monitor. Zoom in
the the highest level. Since your target is in the middle of your frame,
there is no need to pan the image.
Review another image --- just by turning the camera's rear dial. This
will bring the next image without changing the maximum zoom you just
set.
This way, you can easily compare which image is the sharpest. The AF fine tune value used for the sharpest image is the one you should stick to for this lens.
Probably you should first try -20, -15, -10, 0, +5, +10, +15, +20 to see what kind of images you get. Then narrow down the range to, say, 0, -1, -2, -3,... -10.
All you have to do is to shoot (one shot) for a different AF fine tune value and compare the result to see which one comes out the sharpest. This method is more accurate than 45 degree tilted chart shooting, and much easier to do. No PC uploading is necessary. Good luck!

AF Zoom 18-55mm, @18mm, Aperture F3.5 wide open.
| Carnivorous Plants Photography Web Site: Copyright © 2001-2018 Makoto Honda. All Rights Reserved. |