Saving Paradigm and User Presets U1, U2, U3
There are 3 user presets (U1, U2, U3) to save your settings for a quick recall. By using Save User Settings (U123), you can save specific settings to U1, U2, or U3 for later use. To restore the saved settings, just turn the mode dial to that user preset (U1, U2, or U3).
There are two distinct paradigms used to save these changes/settings: Save Paradigm I & II. Any settings you can do belong to either I or II of the Save Paradigms.
Basic Concept
1) Camera is always at one of 7 modes: MASP + U123 ( exclude Auto for now).
2) Mode at "Setting" time: MASP + U123. This is where the mode dial is when you do the setting.
3) Mode at "Shooting" time: MASP + U123. This is where the mode dial is when you are shooting.
4) Things to set:
- i-menu (x12) customization
- My Menu (up to 20) customization
- Button (x8) customization
- Menu item values (there are many)
Save Paradigm I (globally saved - not saved in U123)
For all the settings belonging to this paradigm, whatever you set is saved globally. That is, regardless of which mode (MAPS or U123) you were in at the time of setting, what was set is automatically saved and becomes effective and available in any mode (MAPS and U123) as you turn the mode dial from one mode to another. The camera's power can be turned off and on again. The last change you made is effective and saved forever, until it is changed again.Mode at Setting Time > Mode at Shooting Time
M M
A A
S ===============> S
P (automatically saved) P
U1 U1
U2 U2
U3 U3List of Things Using Save Paradigm I (only several things, as shown below)
- My Menu customization (addling items, removing, etc).
- Release mode setting: S / L / H / H+ / - This is not mentioned in Nikon User's Manual (p.75).
- Storage folder (Photo Shooting Menu)
- Choose image area (Photo Shooting Menu): FX / DX / 5:4 / 1:1 / ...
- Set picture control (Photo Shooting Menu) - This is saved in U123 (User's Manual says otherwise).
- Multiple exposure (Photo Shooting Menu)
- Interval timer shooting (Photo Shooting Menu)
- Time-lapse movie (Photo Shooting Menu)
- Focus shift shooting (Photo Shooting Menu)
Save Paradigm II (saved in U123)
For all the settings belonging to this paradigm, whatever you set while in MAPS mode is automatically saved and becomes effective and available in any of MAPS modes, just like Save Paradigm I. However, if you set something while in U1, U2, or U3 mode, it is only effective in that one mode (U1, U2, or U3) and only until you exit that mode (or until the camera is powered off). To save this setting in U123 modes, you must specifically save it to U1, U2, or U3 (by Save User Settings).
Mode at Setting Time > Mode at Shooting Time
M M
A ================> A
S (automatically saved) S
P P
U1 ----------------------------> U1
U2 ----------------------------> U2
U3 ----------------------------> U3
(saved only until exited)List of Things Using Save Paradigm II (many things...)
- The i-menu customization (selecting 12 menu items).
- The majority (if not all) of the menu item setting.
- Customization of the 8 buttons (f2 Custom control assignment).
Mode at Setting Time
MASPSave Paradigm I Items: Automatically saved and become available in MASP + U123.
Save Paradigm II Items : Automatically saved and available in MASP only (U123 retrieve saved values).
U1, U2, U3
Save Paradigm I Items: Automatically saved and become available in MASP + U123.
Save Paradigm II Items : Available only in U1, U2, or U3 (only until exited).
HOME
Nikon Z7 - My User Manual Summary
Arrival-Sept
28 Z7
Hands-On Testing Voigtlander 10mm F5.6
____________
2019-January-26
NIKON SUPPORT >> 1-800-645-6687
NIKON INC.
6420 WILSHIRE BOULEVARD, SUITE 100
LOS ANGELES, CA 90048-5501
ATTN:SERVICE DEPARTMENT
Nikon Z7 User's Guide >
http://download.nikonimglib.com/archive3/nRrSP005I9dy03whsRi732khVO03/Z7UM_SG(En)01.pdf
Nikon Z6/7 Manual
GENERAL
In the Z's user-interface, you
can set many things. Most of them are menu item values (states), like setting
the VR on/off, setting the release mode to S (single), L (low-continuous), H
(high-continuous), and so on. Others are customization, such as "My Menu" and "i-menu"
customization, or some button customization.
There are probably 100 menu items and other
settings, and it is a formidable task to find the ones you need. To alleviate
the pain, there are two places where you can put your frequently-used
menu items for easy access:
"i-menu" & "My Menu".
The i-menu can accommodate 12 items and is easier to reach, so use it as the
first choice. Then use My Menu to keep other useful items (up to 20 items).
Also, there are 3 user presets (U1, U2, U3) to save these settings for a quick
recall. By using Save User Settings (U123), you can save specific settings to
U1, U2, or U3 for later use. To restore the saved settings, just turn the mode
dial to that user preset (U1, U2, or U3).
There are two distinct paradigms used to save these changes/settings: Save Paradigm I & II. Any settings you can do belong to either I or II of the Save Paradigms. (See Saving Paradigm and User Presets U1, U2, U3 below.)
There are seven menu categories:
Playback / Photo Shooting / Movie Shooting / Custom Setting / Setup / Retouch
/ My Menu
KEY:
(i)
means
i
button, (My)
means "My Menu"
MONITOR DISPLAY
Monitor
Mode
--- I use Prioritize / Simple
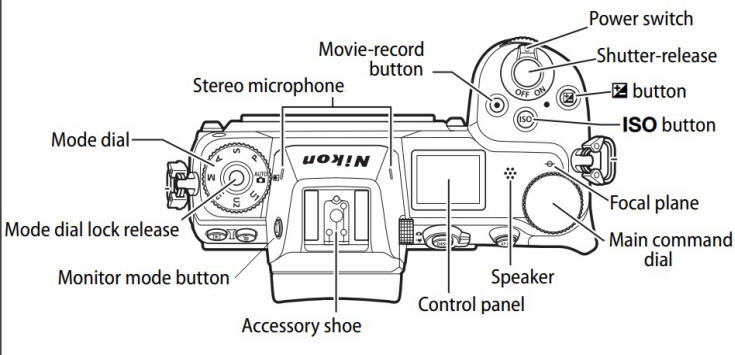
Monitor mode button (left): Automatic display switch / Viewfinder
only / Monitor only / Prioritize Viewfinder
DISP button (back): Indicators / Simple / Histogram / Horizon
For the monitor mode, I use
Prioritize. If I want to view the rear LCD during the shooting, I set to
Automatic display switch.
BASICS
Release Mode / Self-timer
---
See Frame Rate below.
Release-mode button (back):
S (single) / L (low) / H (high) / H+ (extended) / Self-timer
Custom Setting Menu >
c2 Self-timer > delay time / number of shots / interval
Release mode has a dedicated button in
the camera back. There is no need, therefore, to assign this function to the
precious i-menu space.
Can this button be customized??????
Exposure Mode
--- MAPS
Mode Dial: M (manual) /
A (aperture-priority) / S (shutter-priority) / P (program)
Any menu items last set at M/P/A/S modes will be
remembered in all M/P/A/S modes (until changed again). However, menu items set
at U1/U2/U3 modes are remembered in that mode only until you exit that mode.
Exposure Metering Area
--- I use Matrix
(i)
Photo Shooting Menu > Metering: Matrix / Center-weighted / Spot /
Highlight-weighted
Aperture
--- Use the sub-dial (front)
Aperture: lens aperture
Shutter Speed
--- Use the main dial (rear)
Shutter Speed: 1/8000 ~
30 sec (for mechanical & silent shutter), 1/2000 ~ 30 sec (in front-curtain
mode)
Hit i-buttun or DISP button to show these in the rear LCD.
ISO Setting
--- I use ISO
64 / Auto-ISO on
ISO - ISO button + Main
command dial (back): 64-25600
Auto ISO -
ISO button + Sub-command dial (front): On / Off
(My)
Photo Shooting Menu > ISO
sensitivity > Max ISO, Min shutter
Hold ISO button and use the main and sub-command dials to set ISO and Auto-ISO
on/off.
Image Quality
--- I use FX / LARGE /
RAW (lossless) + JPEG (Fine*)
Image Area Size - Photo Shooting Menu > Choose image area: FX
(36x24) / DX (24x15) / 5:4 (30x24) / 1:1 (24x24) / 16:9 (36x20)
Image File
Resolution -
(i)
Photo Shooting Menu > Image size
>
RAW: Large (FX 8256x5504) / Medium (FX 6192x4128) / Small (FX
4128x2752)
JPEG/TIFF: Large / Medium / Small
Image File Format/Compression -
(i)
Photo Shooting Menu > Image quality:
RAW + JPEG (Fine* /
Fine / Normal* / Normal / Basic* / Basic)
RAW
JPEG (Fine* /
Fine / Normal* / Normal / Basic* / Basic)
TIFF (RGB, uncompressed 24-bit color)
RAW Compression - Photo Shooting Menu > NEF (RAW) recording > compression:
Lossless / Compressed / Uncompressed, bit depth: 12 bits / 14
bits
(always Lossless 12 bits for Medium / Small)
White Balance
--- use Auto
(i)
Photo Shooting Menu >
White balance:
Auto / Natural light auto / Direct sunlight / Cloudy / Shade
/
Incandescent / Fluorescent / Flash / Choose color temperature
Picture Control
(i) Photo Shooting Menu
>
Set Picture Control:
Auto / Standard / Neutral / Vivid / Monochrome / Portrait / Landscape / Flat
Sharpening: -3 ~ +9
Mid-range sharpening: -5 ~ +5
Clarity: -5 ~ +5
Contrast: -3 ~ +3
Brightness: -1.5 ~ +1.5
Saturation: -3 ~ +3
Hue: -3 ~ +3
Creative Picture Control: Dream / Morning / Pop / Sunday / Somber / ... / Carbon
Auto Focus
--- I use AF-S / Wide area (S)
(i)
AF Mode: AF-S (single) / AF-C
(continuous) / AF-F (fulltime/movie) / MF (manual focus)
(i)
AF Area: Pin point /
Single point / Wide area (S) / Wide area (L) / Auto area
OK button -
Quick center
The continuous AF-C is only available in the H-mode (not
in H+) that means max of 5.5 fps. But even there, the effective fps with AF-C is
something like 2-3 fps. The D850 will do a much better job with the same 45MP
sensor.
Vibration Reduction
--- I keep it on
(i)
Photo Shooting Menu >
Vibration reduction: Normal / Sport / Off
The 5-axis in-camera
image stabilization gives 5-stop VR capability. With a wide-angle lens, I can
hand-hold at 1/2 second!
NOTE: When using a non-CPU lens (Nikkor or others), you must set a non-CPU lens
number of the lens you are using for VR to be enabled. If you do not, VR mode is disabled (greyed
out).
OTHER TECHNIQUES
Active-D Lighting
--- I keep it
Auto
(i)
Photo Shooting Menu >
Active D-Lighting: Auto / High+ / High / Normal / Low / Off
HDR (high dynamic range)
(My) Photo Shooting Menu
> HDR (automatically shoots 2; use tripod)
In-camera HDR is
convenient and works pretty well. You have some exposure range choices. The
camera automatically shoots two consecutive shots and synthesizes them into a
combined shot. It is like a 1/30-1/15 sec shot for the entire sequence - so
better use a tripod.
Focus Peaking
(My)
Custom Setting Menu >
d10 Highlight peaking: 1 / 2 / 3, Red / Yellow / Blue / White
Focus peaking works well with
my MF Nikkor 20mm f/3.5 lens via the FTZ. Red or yellow is the best color to
use, but keeping this peaking ON all the time is very annoying to the eye. Also,
this is not very accurate...
Focus
Shift
Photo Shooting Menu >
Focus shift shooting
Bracketing
Photo Shooting Menu >
Auto bracketing >
Auto bracketing set: AE & Flash / AE / Flash / WB / ADL
Number of shots: 0~9
Increment: 0.5~+5
Camera does not shoot multiple shots automatically. You
must click the shutter multiple times (each shot is different). To turn this
mode off, just set No. of shots to 0 (zero).
Interval Timer Shooting
Photo Shooting Menu >
Interval timer shooting
CHORES
Format Memory Card
(My) Setup Menu
> Format
memory card
Sensor Cleaning
(My) Setup
Menu > Clean image
sensor
Firmware Version
Setup menu > Firmware
version: C, LF
Nikon released a new update already for the Z7. I
downloaded it, but I now realize I need a card reader to put an update file into
the XQD memory card. I cannot write into my XQD card by simply keeping it in the
camera body.... I have to buy a XQD card reader....
SETUP
Silent
Shooting
(i)
Photo Shooting Menu >
Silent photography: On / Off
Silent mode allows you
to shoot completely silently. It worked well but I could not figure out how to
enable some sort of indicator that a picture has been taken. I know it worked by
reviewing the shots... The finder does flash as you
shoot in H mode ... but in the extended high-speed (H+) I do not see any
flashing of the finder, but the shots are being made.
Exposure Delay /
Electronic Front-Curtain
--- to
minimize blur
Custom Setting Menu >
d4 Exposure delay mode:
Off / 0.2s / 0.5s / 1s / 2s / 3s
Custom Setting Menu >
d5 Electronic front-curtain shutter: Enable / Disable
See my description of these features....
Image File Naming
(My)
Photo Shooting Menu >
File naming (A01xxxxxx)
Custom Setting Menu >
d7 File number sequence: On / Off / Reset
EV Step (Shutter / Aperture / ISO)
--- I use 1/2.
Custom Setting Menu > b1 EV steps for exposure
control: 1/3 or 1/2
Beep
Setup menu > Beep
options: On / Off
Playback Info Display
(My)
Playback Menu > Playback
display options > Additional photo info: Focus point + Exposure info
Grid Display
(My)
Custom Setting Menu > d9 Framing grid display: On / Off
Diffraction Control
--- I keep it
on
(My) Photo Shooting Menu
>
Diffraction compensation: On / Off
Distortion Control
--- I keep it
on
Photo Shooting Menu >
Auto distortion control: On / Off
Flicker
Reduction
Photo Shooting Menu >
Flicker reduction shooting: On / Off
Rear LCD Display
Setup Menu >
Information display: B (Dark on light) / W (Light on dark)
Two display choices for the rear LCD. Use B option. W is
so dark and useless.
Power
Off Time
(My)
Custom Setting Menu > c3 Power off delay
>
Playback / Menu / Image / Standby
CUSTOMIZE
User Presets U1, U2, U3
(My)
Setup menu > Save
user settings: U1 / U2 / U3 > Save settings
See User Preset description below for detail...
Photo
i
Menu
Hit i-menu button to show the 12 items saved in the i-menu.
Hit the button twice to see Mode / Shutter / Aperture / ISO. Boxed items can change by
clicking.
Customize
i
menu
---
This is my (i) menu in "Pink".
Custom Setting Menu > f1
Customize
i
menu
The i-menu can hold 12 items for easy access. The following 31 items can be placed in the i-menu (User's Guide p.23).
- Choose image area
- Image quality (RAW/FINE/NORM/BASIC/...)
- Image size (L/M/S)
- Exposure compensation
- ISO sensitivity setting
- White balance
- Set picture control
- Color space
- Active D-Lighting (Off/L/N/H/H+/A)
- Long exposure NR
- High ISO NR
- Metering
(Matrix/Center-weighted/Spot/Highlight-weighted)
- Flash mode
- Flash compensation
- Focus mode (AF-S/AF-C/MF)
- AF-area mode
(Pinpoint/Single-point/Wide-area/Auto-area)
- Vibration reduction (Off/On/Sport)
- Auto bracketing
- Multiple exposure
- HDR
- Silent photography (On/Off)
- Release mode (S/L/H/H+/Selftimer)
- Custom control assignment
- Exposure delay mode
- Electronic front-curtain shutter (On/Off)
- Apply settings to live view
- Split-screen display zoom
- Peaking highlights (Off/1/2/3)
- Monitor/viewfinder brightness
- Bluetooth connection
- Wi-Fi connection
My Menu ---
My Menu can keep up to 20 menu items for easy access. My Menu is common for all M/A/S/P modes
as well as all U1/U2/U3 modes. Whenever you customize the "My Menu" contents (wherever you
do it) , everybody (M/A/S/P and U1/U2/U3) will see the same My Menu.
--------------------------------------------------------------------------------------------------------------------------------------------
(My)
Save user presets
Save user settings U1, U2, U3
(My)
ISO sensitivity
Minimum shutter speed
(My)
Electronic front-curtain shutter
MOn / Off
(My)
Exposure delay mode
Minimum shutter speed
(My)
Diffraction compensation
Yes / No
(My)
Peak highlights
Yes / No
(My)
Framing grid display
Yes / No
(My)
HDR
Yes / No
(My)
Exposure differential (HDR)
P--
(My)
Built-in AF-assist illuminator
On / Off
(My)
Power off delay
xxx
(My)
Customize i menu
xxx
(My)
Custom control assignment
12 x buttons
(My)
Playback display options
P--
(My)
Beep options
xxx
(My)
Battery info
xxx
(My)
File naming
A04
(My)
Clean image sensor
Yes / No
(My)
Format memory card
Yes / No
Customize Buttons
---
My button customization
Custom Setting Menu > f2
Custom control assignment:
Fn1 button: Choose non-CPU lens number
Fn2 button: Preview (depth of field)
When looking through the EVF, only non-CPU lenses show the
depth of field using
the current f-stop (say, f/22). All CPU lenses (including Z lenses) close down
only
up to f/5.6. So what you are seeing in the EVF is not reflecting the true depth.
You must use the "Preview" button to see the real depth. It works well. The
finder does not get dark, like DSLRs.
AF ON button: Zoom on/off (200% zoom)
I changed this button for ZOOMING -- I found this to be
extremely useful during manual focus.
ARROWS (joystick):
Joystick button:
Lens ring:
Lens button:
Movie
i
Menu
-- to be done --
Frame Rate (fps)
-- p.83
Release mode
Image quality (bit depth)
Frame rate (Silent)
--------------------------------------------------------------------------------------
Continuous L JPEG/TIFF
5 fps (4 fps)
(low)
RAW (12 bit) or RAW+JPEG 5 fps (4 fps)
RAW (14 bit) or RAW+JPEG 5 fps (3.5 fps)
--------------------------------------------------------------------------------------
Continuous H JPEG/TIFF
5.5 fps (4 fps)
(high)
RAW (12 bit) or RAW+JPEG 5.5 fps (4 fps)
RAW (14 bit) or RAW+JPEG 5 fps
(3.5 fps)
--------------------------------------------------------------------------------------
Continuous H+ JPEG/TIFF
9 fps (8 fps)
(extended) RAW (12 bit) or RAW+JPEG
9 fps (8 fps)
RAW (14 bit) or RAW+JPEG 8 fps
(6.5 fps)
--------------------------------------------------------------------------------------
Customization for Photo
f1 Customize Photo i menu
f2 Customize buttons > Fn1 / Fn2 / AF-ON /
Joystick / Joy center / Movie / Lens Fn
f3 OK button
f4 Lock speed & aperture
f5 Customize dialog > main & sub-command dialogs
Customization for Movie
g1 Customize Movie i menu
g2 Customize buttons > Fn1 / Fn2 / AF-ON /
Joystick / Joy center / Movie / LensFn
g3 OK button
g4 AF speed
g5 AF track
Nikon Z7 - Lens Consideration
FE 8-15mm f/3.5-4.5 (F)
FE16mm f/3.5
Voigtlander
Heliar Hyper-Wide 10mm f/5.6 (Cosina)
Awoa
10-18mm f/4.5
Fotofox Leica M-mount Nikon Z Adapter Macro
Z 14-30mm f/4 S 20mm f/3.5
(F)
Z 24-70mm f/4 S
Z 70-200mm f/2.8 S <<=====
300mm f/4 PF (F)
500mm f/5.6 PF (F) <<=====
TC14 Tele-converter (F)
Micro 60mm f/2.8 (F)
Micro 105mm
f/2.8 (F)
Micro 200mm
f/4 (F)
PC 19mm f/4 (F)
Z 20mm f/1.8 S
Z 24mm f/1.8
S
Z 35mm f/1.8 S
Z 50mm f/1.8 S
Z 85mm f/1.8 S
HOME
Z7 Arrival-Sept
28
Z7 Hands-On Testing